Celebrate Epiphany

Celebrate Epiphany with some lovely crafts and tell the Bible Story of the Visit of the Magi. The visit of The Magi (also known as Wise Men or kings) is found in Matthew 2.

Celebrate Epiphany Bible Story

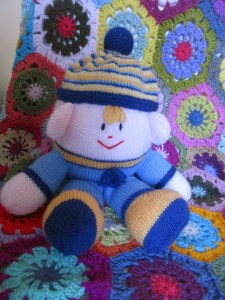
Celebrate Epiphany story  Wise Men knitted dolls

To tell the story you need – some Wise Men, toy camels and a star. You can add some actions too – stars with hands (like in twinkle, twinkle little star), running, looking, kneeling.

Far away from where Jesus was born there were some Wise Men. They read books and knew a lot. They loved to look at the stars in the dark night’s sky. One night they saw a new star! They looked at the new star and they looked at each other. ‘Wow! they thought, ‘this new star means that a new king has been born in Israel. Let’s go and worship him’.

So they packed their things and set off for the important city of Jerusalem. They travelled for a long time. It took days and days to get there. When they arrived in Jerusalem they asked everyone they met, ‘Where is the new baby king?’

Now, there was a king in Jerusalem called King Herod but he wasn’t a baby; he was a grown up and he wasn’t at all happy. He didn’t want a new King! He heard that there were men from a far away place who were asking people, ‘Where is the new king?’ This upset him and it upset the people who were living in Jerusalem. He sent for the men from the temple. ‘Where is this new King to be born?’ he asked. The men from the temple knew the answer because it was written in the Bible. ‘In Bethlehem.’ they said.

Herod sent for the Wise Men and he told them to go to Bethlehem and find this new King and then come back and tell him where the new King was so he could go and worship him too.

So off the Wise Men went. It wasn’t too far to go now. As they got nearer something very special happened. The star was there again and this time it went before them and shone right over the house where Jesus was. The Wise men had found Jesus and they knelt down and worshiped him. They took their treasures out of their bags and gave them to Jesus. They gave him gold, frankincense and myrrh. These were special gifts for a King.

The Wise Men never told Herod where Jesus was. God warned them not to in a dream and they travelled home.

Herod didn’t want to worship Jesus. He wanted to get rid of him. An angel told Joseph to take Mary and Jesus and run away to a different country till it was safe to go back home.

Celebrate Epiphany Craft Ideas

Decorate crown shapes made from air- drying dough. Make crowns from card of buy crowns to decorate with circle stickers. The King is make from a Pringle Container.

Decorate wooden stars with paint and/or sequins. Put the decorated star on named envelope to dry and then put in the envelope to take home. The sequins stick best with PVA glue.

Use a square black paper plate to make these star stained glass windows. Cut out the star shape and then glue brightly coloured tissue paper over the gap on the reverse side. To make this even easier for young children use some clear sticky back plastic in the gap and then add small pieces if tissue paper (it won’t be as neat but it is easier)

A similar craft to celebrate Epiphany using a paper plate – take a look here for instructions!

Enjoy celebrating Epiphany!

First Sad Day Story and Craft

First sad day story and craft is the second ‘page’ in our ‘What’s in God’s Big Book? ‘ story series. We began with ‘God made everything‘. This story is based on Genesis 3

To tell the story

We had our Big Book with this page inside to show at the end of the story and read. We used props to tell the story – Adam, Eve, an apple (it was just fruit in the story but an apple is easy to take a bite from), a toy snake.

First sad day story

Adam and Eve lived in the beautiful garden. Everything was very good (thumbs up). There were trees and flowers and animals. They were happy (can you look happy?).

God had made everything and he had one rule for Adam and Eve to keep. Just one! He said to them, ‘Don’t eat the fruit from the tree in the middle of the garden. If you do you will die.’ They listened and they heard what God said.

Everything was lovely. But then one day a snake began to talk to Eve! ‘Did God really say that you can’t eat the fruit from all the trees in the garden?’

‘We can eat all the fruit from all the trees, except from the tree in the middle of the garden’, Eve replied. ‘If we eat from the tree in the middle of the garden we will die’

‘No you won’t’, said the snake, ‘you’ll become just like God’.

Eve looked at the tree in the middle of the garden. The fruit looked good! So she reached out her hand and she …. picked some of the fruit …. and she …took a bite! (you can ask another leader to play the part of Eve and act this out as you tell the story)

Adam was with her so she gave some to him and he took a bite too!

Adam and Eve had broken the one rule that God had given them. And everything changed. They felt sad. (Can you look sad) They had to leave the beautiful garden. And one day many years later they would die. It was a very sad day.

But God still loved Adam and Eve and he promised that he would send a Saviour to make everything good again.

First sad day craft idea

First sad day craft idea using a paper plate cut into a spiral and made into a snake.

To make the spiral snake you need fairly sturdy paper plates (you need to be able to cut them but you don’t want them to fall apart when the toddlers start glueing on tissue paper!), tissue paper squares in lots of colours, snake tongue shapes cut out and some crayons/felt tips to draw on an eye. Adults can add the wool/string at the end of the make.

(You can add the string/wool beforehand if you prefer. An easy way to do this is to thread a darning needle with the wool and punch it through the plate. Tie a knot and cover the knot with cellotape.)

God made everything story and craft.

God made everything story and craft for toddler group and preschoolers. This is the first page of our Big Book that we made here.

The Story is based on Genesis 1

There are lots of different ways to tell the story of creation. You can use pictures, paper plates that represent the different days, objects from a storybag (model animals, model trees, fruit etc). When I teach this story I focus on a few details

  • God made everything by speaking – he said the word and things were made!
  • Everything God made was very good. (thumbs up!)
  • God breathed life into Adam and them he made Eve from one of Adam’s ribs. (Genesis 2)

When you tell the story you can count the different days together, repeat the phrase ‘It was very good’ (everyone does a thumbs up) and explain that people are very special to God- he breathed life into them and gave them a beautiful and perfect place to live.

Some Creation paper plates that are great to use to tell the story – link to instructions

Paper plates decorated as the days of creation from Genesis 1. God made everything story.

God made everything craft ideas

There are so many crafts you can do about creation! Here are a few ideas from this blog plus a link to a pinterest board where I’ve collected ideas

A creation place mat (requires some cutting out – either do beforehand or let older children do it themselves) , creation collage all about people (cut faces from magazines) we printed out a picture of the world but if you don’t want to do that you could combine the sponge print globe with the faces, a sponge print world – we used circles cut from card, blue and green paint and kitchen sponges that were easy to hold. The paint should be fairly thick!

Creation Pinterest Board with lots of craft ideas!

Make a big book!

Make a big book to use at story time! I’m always looking for a new idea for story time. I like something visual and easy to use. I think it’s important to have props that help children and adults listen to the story and enjoy story time. We’ve completed a Bible Alphabet (a story for every letter of the alphabet). It was great having a long story series. So for the next series we are going to think about ‘What’s in God’s Book’. We will start with creation and then tell stories in chronological order as we go through the Bible. Characters will appear, big events will happen and although every story will stand alone they will also fit together as the story of God’s book.

We will have storybags and props each week but we will also have a big book. And each week a picture or page will appear out of the big book.

How we made the big book

We used blue mount board and yellow paper (150g) and pritt stick (a great glue for this as you can move the paper around just after you have glued it. It’s very forgiving)

The book is actually more of a pocket or pouch. The yellow paper is folded and then glued to the mount board which will make it easy to take pictures out of the big book.

It’s definitely a big book but it will be a great size for our toddler group story time as we have a big group!

Big Book Story Ideas

We are starting with Creation but will then do the following stories

  • Creation
  • Adam and Eve eat the fruit
  • Noah built a great big Ark
  • The Big Tower
  • Abram leaves home
  • God makes Abraham a promise

Easy Story Bag Ideas

Story Bag Ideas that are easy to find and use! If you tell Bible Stories in a Toddler Group setting or with young children in Sunday School you will probably have used a Story Bag. (It’s slightly different from providing a Story Bag for sharing in a small group or one to one as you will probably be telling the story rather than reading it from a book. In a large group the storyteller should be in charge of the props, make sure everyone can see them. Also there is no need to include a copy of a book!)

A Story Bag is a very useful tool in keeping children engaged with a story. Items appear from the bag throughout the story. These items can aid understanding; an unfamiliar object is often easier to show than to explain.

Easy Story Bag Ideas for the beginning of the story

Taking things out of a bag can build excitement and anticipation. When I begin a story I often start by introducing the main character…for example

I’ve bought someone with me today who is in our story. Are you ready to say hello to Mary? Let’s practice.. ‘Hello Mary’. I’m not sure she can hear you! Let’s try again, ‘Hello Mary’. (I take Mary from the story bag)

This makes a good start to the story. Everyone has joined in with saying hello to the main character. Children (and adults) are waiting to see what happens next.

Another way to begin is by taking an object out of the bag that is central to your story such as a model of a Bible time house or a boat. You could begin story time like this…

Today in our story bag is somewhere that Jesus often visited! Let’s find out where? (Take the house from the bag) It’s a house! It’s where his friends Mary and Martha lived. One day they invited Jesus to come and see them…

Story bag Ideas for the middle of the story

If you have started your story by introducing the main character or place then the next items in the story bag should help the story move along.

For example – having said hello to Mary you could help the children think about what she was doing..

Mary was having an ordinary day – she might have been cleaning (take a duster from the bag and pretend to dust and a brush and brushpan and pretend to sweep)..

There are lots of things that people in Bible Stories do that are ordinary and every day like cooking and eating so you can include everyday items in the story bag to help children understand the story.

Here’s a list of items I’ve used

  • Bread rolls
  • Purple cloth (Story about Lydia)
  • Large blue cloth (Sea, lake)
  • Play boat
  • Pans
  • Bowls
  • Dusters/Cloths
  • Sewing supplies (Tabitha/Dorcas)
  • Fruit/Veg (Harvest)
  • Pringle carton characters
  • Knitted dolls
  • Toy camels
  • Knitted donkey
  • Toy sheep
  • Model of flat roofed house (Make your own from a cardboard box or use duplo)
  • Mat – for man to lie on (Man with four friends)
  • Toy animals
  • Model of Noah’s Ark
  • Rock/Stone
  • Sand
  • Coins
  • Large leaves (Palm Sunday)
  • An apple
  • A toy snake
  • A crown
  • Toy boat
  • Toy building tools (useful for lots of stories – Tower of Babel, Noah, Building the Temple, Nehemiah, Parable of the Builders)
  • Red cord/yarn (Rahab rescues the spies)
  • Cushion/Pillow (Jesus asleep in the storm)
  • Characters made from wooden spoons
  • Concertina people (great for crowds – Feeding of 5,000)
  • Paper plate faces (use to explain feelings)
  • Puppets – bought or make your own by adding a lollipop stick to a cut out character
  • Paper plate angels/shepherds – How to make a paper plate shepherd instructions and paper plate angel instructions
  • Oil
  • A Bible

There are so many things you can use in a story bag to help bring the story to life.

At the end of the story

Finishing a story well can be more difficult than getting started. So it’s worth thinking through an ending that is clear. If you know how to finish your story it won’t just trail off…

A Story bag is really useful at the end of a story. If you have used a character then you can end with ..

Mary had an amazing day. Let’s say goodbye .. (and everyone joins in with )’Goodbye Mary’, as you place her in the story bag

If you have used an object like a model of a house you could end the story something like this..

Jesus had been to visit the house. (Put it back in the bag) I wonder where he will go next?

You don’t have to use a story bag every week but it is a great way to keep children and adults listening to your story. Choose a bag that you like and that will be easy to take items from. A basket works well – you can cover items with a cloth to hide them.

My Story Basket!

My Story Bags!

Here’s a Bible Story using props –

Here’s a collection of Story bag Prop Ideas on Pinterest

Songs and rhymes for toddlers!

Singing songs and saying rhymes with toddlers is a great way of helping young children learn. They are fun and interactive. Most toddler groups have a song time using well known favourites. Repetition is good! Here’s a handy list of song and rhyme ideas that are great for toddlers.

  • Head, shoulders, knees and toes
  • Twinkle, twinkle, little star
  • Old MacDonald
  • Zoom, zoom, zoom we’re going to the moon
  • I’m a little teapot
  • Miss Polly had a dolly
  • Open shut them, open shut them make your hands go clap
  • The grand old Duke of York
  • Tommy thumb
  • Wind the bobbin up
  • Row, row, row your boat
  • Jelly on a plate
  • Horsey, horsey don’t you stop
  • 1,2,3,4,5, once I caught a fish alive
  • Humpty Dumpty
  • I hear thunder
  • If you’re happy and you know it
  • Incy wincy spider
  • Here we go round the mulberry bush
  • 5 little ducks
  • 5 little speckles frogs
  • Rock a bye baby
  • Round and round the garden
  • The Wheels on the bus
  • Two little dickie birds
  • 5 little peas in a pea pod pressed

Singing with toddlers often means having actions to fit the words. There can be marching, wobbling jelly, pointing to the parts of the body, pretending to be stars or spiders, counting on fingers, hiding hands behind your back, clapping, stamping – so many!

Some songs are great for adults to sing with their child sat on their knee – Round and Round the Garden, Rock a Bye Baby, Horsey, Horsey don’t you stop, Row, Row, Row your Boat and Zoom, Zoom, Zoom we’re going to the Moon.

Songs and rhymes encourage language development – there’s lots of vocabulary used in a fun and easy to remember way.

You don’t need to worry too much about being the best singer – you don’t need to be able to play the guitar (and although you might want to I think doing the actions to the songs is maybe better as children can copy you and join in).

Mix up songs that are lively and those that are quiet.

Sing a song once at normal speed and then repeat going faster. This works well for, Head, Shoulders, Knees and Toes and The Grand old Duke of York.

Include said rhymes. Mix them in among the songs.

If you have a Story Time include a song that fits your story if you can.

Repeat favourites.

Use props from time to time – an Old MacDonald puppet with toy animals, a Humpty Dumpty! Use items that suit your style and group.

A humpty dumpty knitted toy for encouraging singing with toddlers
Humpty Dumpty

Sign up to the World Nursery Rhyme Week for ideas and free colouring sheets and activity ideas. Everyone’s welcome – parents, grandparents, carers, toddler groups, kindergartens, nurseries, preschool settings.. and it’s a great way to learn more about the importance and value of singing with toddlers!

Here’s a song to make – all about animals and birds and the sounds they make – to a well known tune.

Care for the Family produce a resource for parents called Smalltalk. Every issue of Smalltalk covers a different topic from Potty Training to Creating a Family Budget. Here’s a link to the issue about Singing with Children that you could make available at your Toddler Group. Here’s a link to the list of all the Smalltalk issues – they are so good!

Hannah Prays Story and Craft

Hannah Prays story and craft for young children. A Bible Story all about talking to God and how God hears us when we talk to him.

The Story is from 1 Samuel 1:1-20

Hannah Prays – Story

Bible Truth for Toddlers – God hears us when we talk to him

In the story bag we have Hannah and baby Samuel.

‘Are you ready to say hello to the person in our story? Her name is Hannah. ‘Hello Hannah’. (Take Hannah from the story bag)

Hannah lived a long time ago with her husband. She had nice clothes, and a lovely home but she was very, very sad.

Hannah didn’t have any children and this made her very sad.

What could she do?

No one seemed to care about how she felt.

Who could she talk to?

Hannah decided to talk to God. Sometimes we call that praying. She told him how sad she was. She told God how much she wanted to have a baby. She told God all about how she felt.

God always cares about how we feel. He is always able to listen to us when we talk to him. Even though we can’t see God he is there – he is real, and he is kind and good and powerful.

When Hannah had told God all about everything she felt much better.

Now God doesn’t always give us exactly what we ask him for but he heard Hannah’s prayer and she had a baby! (Take Samuel from the story bag) Let’s quietly whisper, ‘hello Samuel’ – because he’s sleeping!

Hannah called her baby Samuel. She loved him very much.

Let’s say bye, bye to Hannah and Samuel. (Place them back in the story bag)

Hannah prays story – Craft Idea

We have a picture of Hannah to decorate and baby Samuel to add. If you can, have some Skin Coloured Crayons for the children to use – these are really good for all crafts that include pictures of people.

Downloads for the craft

There is another Bible Story Idea about Samuel here. It’s all about Samuel hearing God’s voice and how God speaks to us today. You could tell these stories on consecutive weeks to teach that we can talk to God and God talks to us.

Hey there! So this post has this teeny-weeny affiliate link. Just imagine, if you give it a little clickaroo and buy something, I’ll get this tiny commission thingy. And here’s the best part – it won’t cost you a single, shiny penny more! Isn’t that like, wacky? I know, right? I’m just here, humbly saying thanks in advance for your amazing support. You’re an absolute legend!

David defeats Goliath

David defeats Goliath is a well known Bible Story found in 1 Samuel 17. This is a simple retelling of the story for toddlers

Bible Truth for Toddlers – God helps us

God’s people were in a lot of trouble! They were hiding in their tents! Every day their enemy laughed at them. Their enemy was a huge fighter called Goliath (everyone repeat the name together)

Goliath was taller than everyone else

Goliath was stronger than everyone else

Goliath was scarier that everyone else

What could God’s people do?

They felt small

They felt weak

They were scared

But David was brave. It wasn’t because David was tall (he wasn’t!). It wasn’t because David was strong (he wasn’t). David was brave because he knew God would help him.

‘I’ll go and fight Goliath,’ David said. And he did. He took 1,2,3,4,5 small stones and his sling. He walked towards Goliath and he threw a stone.

It whizzed through the air and plonk! It hit Goliath and he fell down! David won! God’s people didn’t need to hide anymore. God helped David. God is able to help you too.

David defeats Goliath craft Idea

Picture of David and Goliath

Josiah reads God’s Book

Josiah reads God’s book bible story. Josiah was King in Judah at a very difficult time. The temple was in need of repair and God’s people were not following God’s law. This Bible Story tells of how God’s Book was found and how Josiah read God’s Book to the people. It’s taken from 2 Kings 22:1 – 23:2. As this story is intended for toddlers a lot of detail has been left out. There are some fun actions to do during the story so that everyone can join in.

Josiah reads God’s Book – story idea

Bible Truth for Toddlers – God’s Book is for Everyone
  • In the Story Bag – King Josiah puppet/doll, a toy hammer, a brush, a Bible (Take these from the story bag as you need them)
  • Before you begin – explain to everyone that there are some things to join in with during the story; some sweeping, hammering and saying ‘no’.

‘Let’s say hello to King Josiah! Josiah was King a long time ago. He was very upset that the Temple, where people went to worship God, was really messy and untidy. Parts of it needed cleaning. Parts of it needed mending. Josiah said, ‘Let’s fix and tidy the Temple,’ and so work began.

There was sweeping!

There was hammering!

Everyone was busy!

But then they stopped…… Everything went quiet…..They had found something.

What could it be?

Was it silver? NO!

Was it Gold? NO!

Was it lots of money? NO!

It was even better than those things.

They had found God’s Book. (It didn’t look exactly like this Bible but the words inside are the same)

Josiah read God’s Book. ‘This is so important that everyone should hear it’, he said

All the people came to the Temple – the important people, the ordinary everyday people, the old people, the young people. People just like you. People just like me. And King Josiah read God’s Book to everyone.

God’s Book is for everyone!

Story bag props for Josiah Reads God's Book

Here’s a blog post all about making Pringle people. Josiah is made from a Pringle tube – you could use a bread stick tube too. The advantage of using a pringle tube is that it is fairly solid so a pringle person will stand up easily leaving your hands free for storytelling actions.

X is for Xerxes

X is for Xerxes is part of our Bible Alphabet. The following is a much shortened telling of the story of Esther, King Xerxes and Haman. When you are telling a story in a toddler group you have to shorten the narrative and find a way to tell the story simply. To read the full story see Esther

X is for Xerxes story idea

Our story happened a long time again in a country called Persia. There was a powerful king called King Xerxes. He was in charge of a huge kingdom and in his kingdom lots of God’s people lived. They were a long way from home.

Now one of God’s people had married the King (he didn’t know that she was one of God’s people – he had married her because she was very beautiful) Her name was Esther.

And there was another man whose name was Haman. The king liked him very much but he was a very bad and horrible man.

Haman didn’t like God’s people at all. He wanted to get rid of all of them. And so he asked the king, ‘Can we get rid of all these people?’ And the King said, ….. ‘yes!’

Now Esther was very sad and worried. She had to find a way to keep God’s people safe. She knew that she needed help. But who could help her? She sent a message to her family – Pray to God. Ask him to help me. And I will pray too.

Esther asked God to help her. She went to see King Xerxes. She told him what was going to happen to God’s people and how she was one of them. The King was horrified. He was angry with Haman and he protected God’s people. They were kept safe.

King Xerxes was very powerful – but not as powerful as God who is able to keep his people safe and hears them when they ask for his help.

X is for Xerxes props for story telling

People characters made from cardboard tubes

King Xerxes and Queen Esther are made from Pringle Containers. Xerxes is a regular Pringle container and Esther is a whole wheat Pringle tube which is slightly smaller (perfect for making storytelling people of different heights!)

To make you just cover the tube in coloured paper (I used a glue gun to stick this) and then add a face , hair and some clothes. Pipe cleaners are very useful for holding everything together. As they are royalty I added crowns but often it’s just a piece of material held in place with a pipe cleaner as in the case of Haman. There are instructions here

Easy to make finger paint

Easy to make finger paint that uses three ingredients (and one of them is water!)

I spent quite a while searching on line for ready made finger paints but was put off by some of the reviews. I really don’t want children breaking out in a rash because of allergies. The best thing about making something yourself is that you know what’s in the end product.

I found several recipes for home made finger paint and decided to try out the one from Rainy Day Mum partly because I had quite a lot of Corn flour (cornstarch) left over from making crown shapes.

It’s a fantastic recipe. Really quick to make and if you use a mug for the measurements there is a lot. I cooked my finger paints without any food colouring. Once I was happy with the consistency I split it between four bowls and added different colours.

finger paints in bowls showing the bright colours

Finger paint can be used on paper or card or on a plastic mat. You can encourage children to paint with it, make marks on paper and/or just enjoy the texture by mixing the colours on a plastic mat.

A fairly sturdy paper plate makes a good canvas.

paper plate decorated with finger paint

You can also use these paints to add decoration to shapes and pictures. Here’s a crown made from Bicarbonate of Soda and Corn Flour dough with some finger paint decoration. You can see in the picture that home made finger paints add texture too!

You just need to be careful that the paint doesn’t get onto furniture or favourite clothes. If using in a toddler group let parents know beforehand so they can dress themselves and their toddler appropriately. Have some aprons for the children to wear and some baby wipes handy.

To store the finger paints use an air tight container. It will keep for a couple of weeks.

Let’s make crowns to decorate!

These crowns are made from a dough that has three ingredients – and one of them is cold water! It’s air drying so you need to make it a few days before you want to decorate the shapes.

If you are celebrating The Coronation Twinkl has some great ideas and resources here with lots of ideas for Coronation Parties and decorations. Twinkl also have loads of great Coronation themed crafts that would be great for an at home Coronation party. It’s free to join Twinkl and they have loads of resources and ideas. Well worth a look.

Ingredients for the dough

  • 3 Cups Bicarbonate of Soda (Baking Soda)
  • 11/2 Cups Cornflour (Cornstarch)
  • 2 Cups Cold Water

To make the dough

  • Mix everything together in a large pan (it will be watery)
  • Cook on medium heat – stirring all the time
  • Once it has formed a dough remove from heat and allow to cool slightly
  • Knead it on a surface (sprinkle some cornflour to stop it sticking)
  • Roll out
  • Cut into shapes
  • Leave to dry out for at least 24 hours

It’s a lovely dough to use. It did stick to my pan a bit but came off easily with hot soapy water. I have to admit that it was so watery at first that I thought it was never going to work but it did! At toddler group we will decorate the crowns – either with glitter or finger paints. If you wanted to make hanging decorations then you just need to add a hole with a skewer before the shapes have dried out.

W is for Water from the Rock

The People of God were in the wilderness. They had escaped from Egypt but were thirsty. They moaned! God told Moses to strike the rock and out came water. The story is from Exodus 17:1-7

W is for Water from the Rock – story idea

Have you ever felt hungry? God’s people had been hungry and so God had given them food to eat.

Have you ever felt thirsty? God’s people felt thirsty. But instead of asking God to help them find water they moaned and groaned! Why isn’t God helping us? they said to Moses.

Why are you moaning and groaning? Moses said

Then Moses asked for God’s help. What shall I do with all these moany and groany people?

God heard Moses. God helped Moses. God said, ‘Moses, take your staff and hit the rock’.

Moses did what God said. He lifted up his staff and struck the rock and out came water!

God gave the people water to drink. He looked after them.

God is able to look after you and me too.

Water from the Rock Craft Idea

A simple collage to make. Beforehand prepare the rock from brown paper, a sun, some blue paper strips for water and Moses (Pdf below). The children can build the scene.

Here’s a link to another story about Moses

Let’s Make a Paper Plate Basket!

Make a basket using a large paper plate! This is a great basket to make for an Easter Egg Hunt. See end of post for some other ideas too! Baskets are really useful!

All you need

  • Paper plate (9in/23cm diameter)
  • Scissors
  • Stapler
  • Hole Punch
  • Pipe cleaner (12in/30cm length)
  • Stickers to decorate
  • Tissue paper to put inside
  • Small Easter eggs/chocolates hidden – to find!

How to make the baskets

If making these with young children you may want to do several of the stages beforehand. Older children can cut the plate and use the stapler (with supervision – make sure they can use it safely). Punching the holes needs supervision just to make sure they aren’t punched too close to the edge of the plate. You want the pipe cleaner handle to hold!

  • Mark out where to cut the plate (picture 1)
  • Cut along the lines
  • Fold the small section inwards and bend round the two longer sides. Secure with a staple. Do this twice.
  • Punch holes
  • Add pipe cleaner handle (Twist around the punched hole to secure)
  • Decorate with stickers
  • Add tissue paper lining
  • Collect eggs!

The basic basket can be used as a craft for the story of Feeding the 5,000. Just add the five loaves and two fish. If you click on the link you’ll find a post with a Pdf with loaves and fish that you can print.

You could also make it to celebrate harvest. Add some pictures of fruit and veg to your basket.

If you leave out the pipe cleaner handle you could use the basket for a Baby Moses craft too! here’s another idea about Moses.

Once you have a basic craft idea it’s great to be able to adapt it for different age groups and Bible Stories and Seasonal crafts. I’m sure you can think of other ways to use a basic basket shape!

Make a ‘Thank you God’ book

Make a ‘Thank you God’ book to share with toddlers; a great way to teach children about how wonderfully made they are.

We used our ‘Thank you God’ book over several weeks at toddler group. Each week we had an activity to tie in with the theme and sang songs that were connected.

Make a ‘Thank you God’ book

The pages to make your own book are below for you to download and print. The photos on each page are all loyalty free. (Please don’t remove the attribute that is on each photo). You can tie the pages together with string – make two holes in each page in roughly the same place and tie together. Or you could make a large folder and stick the title page to the outside. Each week take out the page that you are using.

Using your ‘Thank you God’ book

At toddler group we began our story time with our welcome song and then talked through the page of the ‘Thank you God’ book that we were using that week. There’s no need to recap on previous weeks – you want to keep the story time short. The children and adults were encouraged to join in – for example clapping when it was in the book. We added extra ideas too. The book is a starting point; add activities that suit your group.

For each week I’ve listed some song ideas. Every week read the Bible verse together (you don’t have to read out the reference but you can say that these words are from God’s Book, the Bible.)

The following are the files for you to download and print

Songs to sing with the ‘Thank you God’ book

There are lots of songs that will fit in with this theme. Here are some ideas.

Songs/Rhymes to use any week

  • Head, shoulders knees and toes
  • From my head down to my toes God loves me
  • I wiggle my fingers, I wiggle my toes
  • The Hokey Cokey (if you are a large group don’t get in a circle – wave arms up in the air for ‘oh the hokey cokey’)

Songs about feet

  • The Grand old Duke of York
  • Walking through the jungle
  • Sleeping bunnies (jumping/hopping at the end of the song)

Songs about hands

  • Open shut them, open shut them
  • If you’re happy and you know it (can use for feet too)
  • Round and round the garden (a rhymes using hands – for adults to do with their child)
  • Miss Polly had a dolly (knocking on the door with our hands)
  • Tommy Thumb (a song using our hands)
  • We all clap hands together

Songs about ears

  • I hear thunder
  • Old MacDonald (all the sounds the animals make)
  • Oh we can play on the big brass drum

Songs about mouths

  • Jelly on a plate (for eating)
  • All songs – we use our mouths for singing!
  • The wheels on the bus – the verses the Daddies on the bus go ‘Shush’, the babies on the bus go ‘wah, wah, wah’ and the mummies on the bus go ‘chatter, chatter, chatter’.

Songs about eyes

  • I see blue sky (second verse of ‘I hear thunder’)
  • Sleeping bunnies (we close our eyes to sleep)

Songs about noses

  • I wiggle my fingers, I wiggle my nose
  • Head, shoulders, knees and toes

A really great book for songs and rhymes is ‘This Little Puffin’ compiled by Elizabeth Matterson. First published in 1969 it’s been updated. Well worth buying if you work with under fives. I’ve had my copy for over thirty years (might be time to buy the updated edition!) – Affiliate link – if you click on the above link and make a purchase this blog will receive a small commission at no extra cost to you. Thank you.

Craft/Activity Ideas to go with the ‘Thank you God’ book

Feet – decorate foot prints

Hands – make hand prints with paint. Do finger painting. Play with dough. Build with bricks.

a girl sitting at a table with green paint on her palm
Photo by Vlada Karpovich on Pexels.com

Ears – put together a sound/listening table with musical instruments, scrunchie paper, rain sticks.

Mouths – decorate biscuits (check for allergies first). Make smiley faces using paper plates.

Eyes – have a ‘looking table’ with large magnifyers and leaves, pine cones, flowers for children to take a closer look at. We used this idea for Autumn too.

Noses – make scented pictures. Beforehand use some inexpensive perfume to spray collage materials. Allow to dry. At toddler group let the children create scented pictures using the now scented collage materials. Here’s a similar idea. Scented flower pictures.

Samuel heard God’s Voice Story and Craft for toddler group

Samuel heard God’s voice story and craft for toddler group. This is a lovely story to tell – there are actions for everyone to join in with and an idea for story bag items.

The story is found in 1 Samuel 3:1-10

Samuel heard God’s Voice story idea for toddler group

In the story bag have Eli and Samuel. I have a knitted doll for Eli and a cardboard tube model of Samuel.

You can also do actions during the story – particularly for Samuel sleeping. Encourage everyone to join in with the voice that calls ‘Samuel’

Samuel Bible Story for toddlers

‘Say hello to Samuel! he was a real person who lived a long time ago. When he was a young boy he lived in the temple; the very special place where people went to worship God.

One night he got ready for bed, and snuggled down to go to sleep. Let’s pretend to be asleep. We have to be very quiet. Suddenly Samuel heard someone calling his name, ‘Samuel’. That must be Eli, the old priest calling me, he thought. So up he got and went to Eli. ‘Here I am, you called me!’ ‘No I didn’t’, said Eli. ‘Go back to bed’.

Samuel went back to bed and closed his eyes and snuggled down to go to sleep. ‘Samuel’, he heard the voice again! He got up and went to Eli, ‘Here I am, you called me’. ‘No I didn’t, go back to bed’.

Samuel went back to bed. Snuggled down and closed his eyes. ‘Samuel’, he heard the voice again! He got up and went to Eli and said, ‘Here I am, you called me.’

Then Eli realised something. It was God calling Samuel’s name. God wanted to speak to Samuel. ‘Go back and lie down Samuel and when he calls your name again say, ‘speak Lord, your servant is listening.’

Samuel went back to bed and lay down. And sure enough he heard, ‘Samuel, Samuel’. He said, ‘Speak Lord, your servant is listening.’

God still speaks to us today. Not in a voice we can hear like Samuel heard, but through the Bible. Show your Bible.

Samuel Craft Idea for toddlers

This craft is Samuel in his bed – don’t glue Samuel to the bed; he just slots inside. Children will enjoy taking him in and out of bed and can retell story.

All you need

This post contains affiliate links. If you make a purchase through these links, I may earn a small commission at no extra cost to you. Thank you so much for supporting this blog!

The Wheels on the Bus Craft

The Wheels on the Bus is a well known and often sung song at Toddler Group so we made a fun craft to go with the song. The Bus can be decorated with collage materials and crayons. We added some fun face stickers too.

Some ideas for collage materials

  • Tissue paper squares (lots of colours)
  • Wool
  • Sugar paper cut up into different shapes
  • Bits of wrapping paper
  • Fabric (Cut into squares using pinking shears – it won’t fray)
  • Felt
  • Card shapes – often designed for card making, you might find some in charity shops
  • Petit four cases/Cup cake cases

You can decide if you want to use lots of different materials or just a few. It’s good for children to have some choice.

Here’s a printable of the bus

Here’s some lyrics for the Wheels on the Bus.

Jesus calls the First Disciples

In Mark 1:16-20 we read about Jesus calling his first disciples.

Jesus calls his first disciples – Bible Story Idea

To tell the Story you will need the different characters, a boat, a net and a fish in the Story Bag. Take them out as you need them.

One day Jesus was walking along near the Sea of Galilee. It’s a big lake that has lots of fish. Most days there were people there who were fishing. They had boats and big fishing nets to catch the fish in.

On this particular day Jesus saw two men who were throwing their big fishing net into the water – their names were Simon and Andrew. Jesus called over to them, ‘Follow me, and I will make you become fishers of men.’

Simon and Andrew heard Jesus. They looked up from what they were doing and then they left their net and their boat and they followed Jesus!

A little further along Jesus saw two brothers, James and John. They were sitting in their boat mending the fishing net. Jesus called to them, ‘Follow me’. They heard Jesus and they left their boat and their net and they followed Jesus!

Craft Idea

To make this craft you need

  • Paper plate folded in half (Cut a small slit to slot the lollipop stick through to make a mast)
  • Lollipop stick
  • Card or sugar paper to make the sail
  • Corrugated card to make water (optional)
  • Tissue paper or similar to decorate the boat
  • A net (I used the net that is packaging for oranges/lemons)

Can you find the lost sheep? – craft & story

A lift the flap craft! Can you find the lost sheep? This craft is not only something to make but will help to retell the story of the Shepherd finding his lost sheep. (From Luke 15:1-7) Children are familiar with lift the flap books – something to find on the page that’s hidden under a flap. This craft uses the same idea and is fairly simple to make. Young children will need some help to make sure that they glue the sheep in the right place and that they don’t stick the flap down. You could always choose to glue the sheep in place beforehand.

Step by step to making the lift the flap craft

The dark green paper is folded in half but the top half is cut slightly less wide (by about 1cm) so it is easy to open. You don’t have to do this but it makes it easier for children to use.

The Lost Sheep Bible Story Idea

‘One day there were some very moany, groany people who were cross with Jesus. They thought that they were very important, special people and that Jesus should spend all his time with them. But Jesus was busy spending time with people who had done bad things! ‘How can he spend his time with these awful people?’ they said.

Jesus knew that they were moaning and groaning about him so he told them this story…

‘Once upon a time there was a shepherd who had a 10 sheep. He looked after them really well. He gave them food to eat and water to drink. Every day he counted them – 1,2,3,4,5,6,7,8,9,10 – just to make sure they were all safe and sound.

But one day there was a problem. The shepherd was counting his sheep, one – then two – then three and so on – all the way to nine! And then… where was 10? One sheep was lost. Oh No! What could he do?

He missed his lost sheep and so he went off to find it. The Shepherd was determined to find his lost sheep. He looked here and he looked there, he looked everywhere! He walked over the hills, through the forest, behind the rocks. Looking and looking!

And then he found the sheep that was lost! He picked it up and carried it home. Can you imaging how he felt?

He was so happy that he called all his friends and they celebrated! All his sheep were now safe and sound.’

Jesus had finished telling the story. Jesus looked at the moany, groany people and he said to them, ‘There is lots of happiness in heaven when someone who knows they are lost comes back to God.’

Downloads for the craft

Some other sheep craft are here

Some other lift the flap craft here and here

This Lost Sheep Storybook is available from Amazon. (affiliate link – if you click and purchase let their light shine will receive a bit of money from Amazon – to buy craft supplies! – at no extra cost to you.)

Let’s meet Anna and Simeon!

Let’s meet Anna and Simeon who saw Jesus in the Temple in Jerusalem. We read about them in Luke 2:22-38. This story isn’t always told at Christmas time but it fits in between the visit of the Shepherds and the arrival of the Wise men. (When Herod starts to anxiously look for Jesus in Matthew 2 – the new King, Jesus has already been in Jerusalem.) Most people didn’t see anything special about this visit but Simeon and Anna recognised who Jesus is. Simeon knew that Jesus was God’s salvation and Anna saw that Jesus was the one bringing redemption.

Let’s meet Anna and Simeon Bible Story Idea

In the story bag have the main characters to show at the right time in the story – Mary, Joseph, Baby Jesus, Simeon and Anna.

Jesus had been born! Mary and Joseph gave him his special name – Jesus – which means ‘The Lord saves’. Then some days later they needed to go to the big city of Jerusalem to the Temple. The temple was a very special place. People went there to worship God. Mary and Joseph needed to go there to say thank you to God for the new baby.

It wasn’t too far to travel. Let’s walk with them. (make the sound of walking by tapping hands on knees)

They arrived at the temple and went inside. It was a very special place. Lots of people were there. One of them was an old man called Simeon. (Say hello to Simeon) Simeon had been looking forward to seeing someone. He was looking forward to seeing the Saviour that God had promised to send. And today was the day! Simeon saw Jesus. And even though he was a baby Simeon knew he was the saviour sent from God. Simeon held Jesus in his arms and said thank you to God for sending the Saviour.

And then a woman saw Jesus. Her name was Anna. (Say hello to Anna) She was very old and came to the temple everyday. And on this day she saw Jesus and she knew that he was the Saviour! She began to tell everyone and she said thank you to God for sending the Saviour.

We can say thank you to God for sending Jesus – the Saviour.

Anna and Simeon to make

This is a variation of the Yarn wrapped candle. You need cardboard tubes – you can purchase these or use a halved kitchen roll. Add a face, hair or beard and wrap yarn around the tube for clothing. Take a look at the Yarn wrapped candle post for instructions about that. You don’t need to glue the yarn! Add a headdress and secure with a pipe cleaner.

Simeon and Anna made from cardboard tubes and wool

Birth of Jesus Story Video

The Birth of Jesus story video for young children to enjoy. Jesus’ birth is the heart of Christmas. This story video begins with the journey to Bethlehem and ends with the Shepherds visit.

Feel free to use and share.

A lovely craft idea to do – make a Christmas collage using wrapping paper and Christmas cards. If making with young children cut the shapes beforehand. If making with your own child at home you could have a go at teaching some cutting skills using child friendly scissors. Always take care!

Birth of Jesus Story video craft idea to do.

Here’s a link to a pinterest board with lots of Christmas craft ideas

Lion Craft using Paper Curls

This is a lovely lion craft using paper curls that are surprisingly simple to make. The paper curls add a lot of texture for the mane. If you use a variety of yellow and orange colours it adds some depth to the finished craft. It’s really important that you use light weight paper to make the curls or you won’t get curl effect.

We used this craft to accompany the story about Daniel in the Lion’s Den. You can find a toddler friendly version of the story here.

All you need to make the lion craft

  • Print out of the lion (see below)
  • Yellow and orange paper cut into 1cm wide strips that are about the length of A4 paper and then curled. Simply hold one end of the paper and then pull a scissor blade along the length. I used this paper. You ideally want a low weight paper to make the curls
  • Some yellow/orange crayons or pencils
  • Glue
All you need to make a lion picture with curls of paper
Lion picture with paper curls for the mane

Platinum Jubilee Ideas

  • Some of the links in this post are affiliate links which means if you click on the link and purchase the item I will receive commission at no extra cost to you.

We will be celebrating Queen Elizabeth’s Platinum Jubilee at toddler group with crowns to make, cakes and a special song! The bunting will be up! Here are some Platinum Jubilee Ideas for you!

Platinum Jubilee crowns to make

Depending on your budget and size of your group there are two choices. You can buy ready made crowns to decorate or you can make your own completely from scratch!

Make your own crowns from scratch

You need some long strips of light card or sugar paper that will fit around a toddlers head. Leave them flat – you don’t want to transform them into a wearable crown till after they have been decorated.

Once you have your long strips of card or sugar paper let your toddlers imagination take the lead – they can decorate the crown as much (or as little) as they like. Provide lots of crayons, stickers and paper shapes that they can use to add lots of ‘jewels’ to their crown. Once the glue has dried transform the card/paper strip into a wearable crown using some cellotape. Make sure it fits!

If you have lots of collage bits and bobs this is a great craft for using some of them up!

A crown craft idea for young children. Platinum Jubilee ideas.

Buy some crowns to decorate

If you are short on time then this will save you some. You can buy crowns that are ready for some decorations to be added and come with an adjustable fit. There won’t be another Platinum Jubilee for a long time so you may want to splash out! I bought some ready to decorate crowns and some stickers to decorate.

A Jubilee Song

As well as making crowns to celebrate the Platinum Jubilee we’ll be singing this great song by The Cheeky Pandas

We’ll also be having cakes to share but those aren’t made yet! Keep an eye out on my instagram where they will appear!

Treasure in a Field – Stories Jesus Told

This Story is from Matthew 13:44. It’s all about finding treasure in a field. It’s just one verse but one clear meaning too – being in God’s kingdom is worth more than everything else.

Treasure in a field story Idea

You need some treasure in a box, a green blanket/cloth and a trowel or spade (keep the latter away from young children or use a plastic spade). Bury the treasure under the green blanket ready to dig it up at the right time in the story.

‘One day Jesus told a made up story to show everyone that being part of God’s Family (Kingdom) is worth more than anything else. Let’s listen to the story he told…’

Once upon a time there was a man who was digging in the farmers field. He was digging and digging – and then he found something. I wonder what it was? It was a box of treasure! (Show the treasure). But the field wasn’t his and so the treasure wasn’t his!

But he had a plan. He put the treasure back where he had found it (put it back under the green blanket). Then he went home and he got all the things that he owned together and sold all of them! He went to the farmer – ‘Can I buy your field?’ ‘Yes’, said the farmer, ‘It’s now yours.’ Then the man got his spade and went to the field and starting digging – (act this out) and there was the treasure and now it was his. Now had more than he had ever had!

Jesus told this story to show us that being in God’s family is worth everything!

Craft Idea – finding treasure in the field

  • Some of the links in this post are affiliate links which means if you click on the link and purchase the item I will receive commission at no extra cost to you.

To make this craft you need…

  • Green paper (folded in half – portrait)
  • Sequins and shiny paper cut up into small shapes
  • The downloads of the treasure box, spade and words, ‘Can you find the treasure’ (which can be printed into labels)
  • Glue
  • Crayons/pencils
  • There is also the option of adding grass to the field (see photo)

Followers of Jesus – Tabitha toddler bible story

Followers of Jesus – Tabitha toddler bible story to tell in toddler group.

In Acts 9:36-43 we meet Tabitha (her Aramaic Name) or Dorcas (her Greek name), a follower of Jesus who sews clothes for the women in the church. The simple toddler group craft is a printout of a T-shirt that the children can decorate with fabric pieces. Use any fabric that you have!

When Tabitha dies the church leaders send for Peter. He comes to visit and seeing the sadness of the women he sends them out of the room, kneels down and prays. He takes Tabitha by the hand and says to her, ‘Tabitha, arise’. And Tabitha opens her eyes and sits up! It is a wonderful story.

Followers of Jesus Tabitha toddler bible story

To tell the story to young children have some dolls/puppets to represent Peter and Tabitha. Show something that has been sewn (a dress, or blouse). Take the items out of the story bag as you need them.

‘Say hello to Tabitha! She was a follower of Jesus. She cared very much about the other women in her church and she made them beautiful clothes. But one day something very sad happened – Tabitha died.

Everyone was very upset. They sent for Peter – one of the friends of Jesus. He came to see them straight away. He was sad too. He saw how much everyone missed Tabitha.

He knelt down and he talked to God. Straightaway something amazing happened. Peter looked at Tabitha’s body and he said, ‘Tabitha, get up.’ She opened her eyes, she sat up! Peter took her by the hand and helped her. Then he called out to the women – Come and see, Tabitha is alive and well again!’

How could Peter do that? Peter didn’t bring Tabitha back to life. Jesus did. And many people who heard about what had happened believed in Jesus.’

Tabitha Toddler Group Craft Idea

Tabitha T-shirt craft

This is an idea I’ve posted about before but this time it’s a download! A simple T-shirt outline for the children to cover in fabric.

All you need

  • Print out the T-shirt shape and photocopy for your group
  • Fabric cut into shapes that toddlers can handle (if you have pinking shears use them to prevent too much fraying. If possible have a variety of colours. Toddlers won’t necessarily cover the whole T-shirt so you may not need as much fabric as you imagine.
  • Glue sticks. We use these.

This post contains affiliate links. If you make a purchase through these links, I may earn a small commission at no extra cost to you. Thank you so much for supporting this blog!

Parable of The Builders – Stories Jesus Told

  • Some of the links in this post are affiliate links which means if you click on the link and purchase the item I will receive commission at no extra cost to you.

This parable of the builders is from Luke 6:46-49. It’s a great story to tell as you can dress up as a builder, use actions, sing the song ‘The Wise Man Built His House Upon The Rock’, and, if you are feeling adventurous, use sand rock and water. But it is really helpful to explain why Jesus told this story – so that is where we began. A simple sentence – ‘Jesus told this story to show how important it is to listen to and do what he says.’ It’s also helpful to finish by saying , ‘If we listen to and do what Jesus says our lives last, just like the house on the rock lasted’.

We can’t always explain everything about the parable in the way we might like because the children are so young but we can say something to encourage the adults listening to begin to think further about Jesus.

The Parable of the Builders Story Idea

We had two people to act out the story. One of them also narrated what was happening. We dressed up as builders! Everyone joined in with actions of building, the rain, the floods and the crash as one of the houses fell.

Once upon a time there was a builder who just wanted a house as quick as possible! He chose to build on the sand. It would be quick and easy to build a house. He did a bit of digging and found some stones to make a house on the soft sand. Soon he was finished and sat down to have a rest!

There was another builder who also wanted a house. This builder wanted to build the house really well and so he built his house on rock. He worked so hard digging the foundations, cutting the stones, building them on top of each other. It took a lot longer to complete the build! But then the house was finished and he sat down to have a rest.

Suddenly the rain came and the floods. The house on the rock kept standing! But the house on the sand fell down with a crash!

If there is just one person telling the story they could stand in a different spot for the foolish builder and act out the part and then move to a different spot for the wise builder.

Props for acting out being a builder
Parable of the builders Bible Story props

The builders craft idea

For the craft we made a house – print out the outline and cut up loads of paper to make bricks that can be stuck on the house.

A picture of a house to colour or decorate as a collage
Parable of the builders craft idea
The Song – The Wise Man Built his House upon the Rock !

The Lost Sheep – Stories Jesus Told

Lost Sheep Bible Stories with two craft ideas for different age groups.

  • Some of the links in this post are affiliate links which means if you click on the link and purchase the item I will receive commission at no extra cost to you.

The Lost Sheep is a story that Jesus told. Jesus often told parables; stories that have one hidden meaning. In Luke 15:1-7 Jesus tells the story about the lost sheep to show the self important Pharisees that the Tax Collectors and sinners who he socialised with were welcome in the Kingdom of God. The latter often knew that they needed a Saviour while the former thought they were already righteous. When we tell this story we can and focus on the joy in Heaven when something lost is found. In this case the sheep is like us, we need to be found.

The Lost Sheep Story Idea

‘One day there were some very moany, groany people who were cross with Jesus. They thought that they were very important, special people and that Jesus should spend all his time with them. But Jesus was busy spending time with people who had done bad things! ‘How can he spend his time with these awful people?’ they said.

Jesus knew that they were moaning and groaning about him so he told them this story…

‘Once upon a time there was a shepherd who had a 10 sheep. He looked after them really well. He gave them food to eat and water to drink. Every day he counted them – 1,2,3,4,5,6,7,8,9,10 – just to make sure they were all safe and sound.

But one day there was a problem. The shepherd was counting his sheep, one – then two – then three and so on – all the way to nine! And then… where was 10? One sheep was lost. Oh No! What could he do?

He missed his lost sheep and so he went off to find it. The Shepherd was determined to find his lost sheep. He looked here and he looked there, he looked everywhere! He walked over the hills, through the forest, behind the rocks. Looking and looking!

And then he found the sheep that was lost! He picked it up and carried it home. Can you imaging how he felt?

He was so happy that he called all his friends and they celebrated! All his sheep were now safe and sound.’

Jesus had finished telling the story. Jesus looked at the moany, groany people and he said to them, ‘There is lots of happiness in heaven when someone who knows they are lost comes back to God.’ ‘

The Lost Sheep Craft Idea

Lost Sheep Craft- download the image and decorate with yarn, crayons and/or cotton wool

An idea for older children – Lost Sheep Collage– the download for the small sheep is below. I used a gardening catalogue for the tree and flower photos and coloured paper for the hills and sun. The paper is from A4 Coloured Paper

All you need – glue, paper to make the hills (different shades of green), blue paper for background, yellow for sun, pictures of flowers and trees, tissue paper for grass and a sheep to hide.

Decorate the mini sheep with yarn or cotton wool.

God Knows When I Feel Sad and When I Feel Happy

God knows when I feel sad and when I feel happy is a toddler friendly version of the Easter Story. We focus on how Jesus’ friends felt and how they were sad because he had died and then happy at the conclusion of the story. This is a suitable way to tell the Easter story to young children. There is no need to dwell on the physical suffering of the Lord Jesus but it is OK to use the word ‘died’ rather than euphemistically refer to Jesus ‘going away’. Adults go away all the time – we don’t want children to confuse these two separate experiences.

The Easter Story – from John 19:28-30; 20:1,11-18

To tell the story it is helpful to have a model of the tomb. We used a cardboard box.

God knows when I feel sad story idea

Mary was very sad (can you look sad?). Her friend Jesus had died. He hadn’t ever done anything wrong but some people were jealous and had wanted to get rid of Jesus. They had made sure that he died. It was an awful thing to have done.

Jesus’ body had been put in a tomb and a big stone had been put infront. But now the stone had been moved and the body was gone! Mary was so sad that she began to cry. She looked inside the tomb – the body of Jesus was gone but there were two angels sitting down. ‘Why are you crying?’ they asked. ‘The body of Jesus has gone,’ she replied.

Mary heard footsteps. She saw a man who she thought was the gardener. ‘Have you taken the body of Jesus? Can you tell me where it is?’ she asked.

He looked at Mary and he said one word – he said her name, ‘Mary’. And then she suddenly knew – it wasn’t the gardener, it was Jesus! He was standing right infront of her. ‘Go and tell the others’, Jesus said. And off she she went to find Jesus’ friends to tell them that Jesus was alive! Mary wasn’t sad anymore – she was happy! Jesus knows when I am happy too. He knows when you feel happy!

Easter craft Idea

What you need to make the stained glass effect paper plate Easter scene

  • Square paper plates – cut out the centre
  • Sticky back plastic to fill the centre – sticky side the same as black rim of plate
  • Tissue paper – torn into squares – to cover the sticky back plastic
  • A tomb and stone to glue on last

Black Square Paper Plates click the link to buy the paper plates used in this craft (affiliate link)

Here’s a link to a paper craft Easter garden to make

Easter Craft – a paper Easter Garden

Easter Garden Craft

Easter Craft – a paper Easter Garden that is easy to make. Easter Gardens are lovely but if you don’t have the time to make a garden with soil and real plants then this is a simple alternative. It is a great reminder of the Story of Easter.

To make the Easter Garden you need

  • picture of the empty tomb printed onto card (see file to download – there is a choice – one has the words ‘Jesus is alive!’)
  • pictures of flowers from garden catalogues or magazines
  • glue
  • pencils and crayons

Make the picture while the card is flat and then fold in half so the tomb and hills are vertical.

This craft is suitable for toddlers upwards. Older children can cut out the flower pictures and or draw their own. You can add stickers and tissue paper shapes too.

Here is another Easter Garden idea using a paper plate

My Easter Pinterest Board has lots of Easter themed craft ideas

God Knows when I feel….excited!

God knows when I feel excited is all about Jesus’ arrival in Jerusalem. Children are often excited so it’s great to tell a story they will relate to. This story from Matthew 21 is about the excited crowd who welcomed Jesus into Jerusalem. Traditionally this event is called Palm Sunday. It begins the week of Easter. We’ve told this story many times at Toddler Group. The following is an idea…

God knows when I feel excited story idea

In the storybag you might like to have a large leaf and a donkey..

‘I wonder if you have ever felt excited? In today’s story from the Bible there are lots of excited people. Let’s find out why they were excited.

Crowds and crowds of people were all along the road. There were mums and dads, grandmas and grandads and children just like you! ‘Can you see? Is he here?’ They looked along the road. And then they saw him! They called out, ‘Blessed is the King who comes in the name of the Lord!’ as Jesus passed by. They shouted, ‘hosanna!’ (which means ‘God saves’) They waved palm branches and threw their cloaks into the road. They were so excited to see King Jesus!

Jesus wasn’t riding a big, strong horse – he was on a donkey. He was the king but he was the good King who had come to save and rescue the people.

They people welcomed Jesus – the King sent from God.’

Craft Ideas

God knows when I am excited craft for Palm Sunday story
Large leaves to decorate
God knows when I feel excited Palm Sunday craft
A palm leaf to wave – made using the shape cut from the paper plate suncatcher!

Another idea using large pictures to tell the Palm Sunday story This post includes printables to make your own street scene.

God knows when I feel….thankful

God knows when I feel thankful is a story from Luke 17:11-19.

God knows when I feel thankful story props

God knows when I feel thankful story idea

I used 10 wooden spoons to represent the ten men that asked Jesus to help them. On one side there is a sad face and on the other a happy face. Turn the spoons around as the men are made well. You can stand the spoons in some foam, oasis or a wooden block with drilled holes. A wooden block will last a lot longer so if you can go for that option.

One day, as Jesus was walking along the road, 10 men called out to him. They didn’t come close because they weren’t very well and they didn’t want anyone to catch what they had. They called out to Jesus, ‘Please help us.’

Jesus saw them. Jesus heard them. And Jesus helped them. He made all 10 men better! They were so happy! They started to go back to their families and friends. But one man stopped. He turned round and came to where Jesus was. ‘Thank you’, he said.

It is always good for us to be thankful for the things we have and to say, ‘thank you’.

God knows when I feel….scared

God knows when I feel scared. God really does know how we feel. This week’s story is from Luke 8:22-25 when the disciples were scared. Even though Jesus was sleeping during the storm he is the Son of God, and he still knew how the disciples felt.

God knows when I feel scared story idea

In the storybag – disciples, a boat, a cushion and the emoji face. There are lots of actions you could do during this story. Encourage everyone to join in.

To begin – I wonder if you have ever felt scared or frightened? – show the emoji face. One day Jesus’ friends were very scared. Let’s find out what happened…

Jesus and his friends got into the boat. ‘Lets go across the lake’, Jesus said.

They began to row. But Jesus wasn’t rowing. He was doing something else. He was sleeping.

Jesus’ friends kept rowing.

And then something started. Drip, drip, splash, splash. It was raining! Whoosh, whoosh! The wind was blowing! The boat was rocking. The boat was fillng up with water!! Oh no! They were in danger. And they were scared.

‘Wake up, Jesus!’ they said, ‘We are in danger and we are scared.’

Jesus knew they were scared. He cared about his friends.

‘Stop!’ Jesus said to the wind, the rain and the stormy waves. And they stopped. And everything was calm.

Jesus cares when we are scared. We can ask for his help.

Jesus calms the storm craft idea

God knows when I am scared craft idea of a boat in the storm
All you need for the craft..
  • Background paper – Grey or white
  • Selection of blue paper waves
  • Boat shape
  • Lollipop stick for the mast
  • Triangles for sails
  • Crayons to colour rain
  • Glue
  • ‘God knows when I am scared’ printed out

The labels are available for download. Either print on paper and cut out or print onto a sheet of labels.

God knows when I feel….. busy!

God knows when I feel busy! This term we are telling Bible Stories that remind us that God knows how we feel. We start with Martha feeling busy. The story is from Luke 10: 38-42. Each week there will be a different emoji paper plate face that represents how the character in the story is feeling.

I’m not sure that toddlers dislike feeling busy but the adults listening in to this story will probably relate to Martha.

God knows when I feel busy bible story idea

In the story bag I had – the emoji paper plate face, Martha, Mary, pan, wooden spoon and an apron that I put on during the story. As you introduce the characters take them from the story bag and say ‘hello.

One day Martha invited Jesus to come to her home for a meal. She lived with her sister Mary

Jesus was very happy to go to Mary and Martha’s house.

When he got there Jesus began to talk about God. Mary so wanted to listen to everything that he had to say. She sat down and listened.

But Martha had a lot to do! There was tidying to be done. There was the cooking to be done. Pans needed stirring!(Use the props from the story bag – encourage the children to mime the actions too) Food needed chopping! Plates needed wiping! Water needed pouring! She was busy, busy, busy! (Can you say that with me? She was busy, busy, busy!) – show the face of the busy person.

Mary sat still and listened to Jesus.

Martha was not happy! She was so busy and no one was helping!

She said to Jesus, ‘Tell my sister to help me!’

But Jesus didn’t do what Martha said. Instead he said to Martha, ‘You don’t need to be so busy. You need to sit and listen to my words too.’

Today we can stop being so busy and instead listen to the words of Jesus by listening to stories about him and reading the Bible.’

The print out is from pixabay. Here’s the link to the plate for you to print

I cut out lots of food pictures from magazines for the children to choose from to decorate their plates. Here’s a photo of the craft table set up (minus the glue which I always put out last so I can put the lids away – they are small and could be a chocking hazard)

The Boy with 2 Fish and 5 Loaves – A Bible Number Story

This Bible Story had lots of numbers! 2 fish, 5 loaves, 12 baskets of leftovers and 5,000 people! But we are using it to count to five. The Story is from John 6. It is, of course, ‘The feeding of the 5,000’. The Bible Truth for Toddlers is ‘Jesus is amazing!’. There is also something for the adults to think about at the end of the story.

To tell the story you need – Philip and Andrew, a boy, loaves, fish and some extra people for the crowd. (I’ve used concertina people shapes)

The feeding of the 5,000

The boy with 5 loaves and 2 fish story idea

Ask everyone to be ready to rub their tummy every time they hear the word ‘hungry‘ during the story

It was getting late. There were so many people in the crowd – lots and lots of people (Take them out of the storybag as you say this) And all the people were hungry.

Jesus was there, he had been talking to the people but now they needed something to eat. ‘I’m so hungry‘, they said to each other.

Jesus spoke to Philip (take him out of the storybag). ‘Go and buy everyone something to eat. They are all very hungry!’ But Philip looked in his pockets and he didn’t have any money. He was never going to have enough money to buy food for all the hungry people.

Andrew (take out of storybag) had found someone who had some food to share. Shall we find out who it is? It was just one small boy (take out of storybag). I wonder what he had? Let’s see (take out of storybag) He had two fish – let’s count them – 1,2 – and five loaves of bread – let’s count them – 1,2,3,4,5.

It’s not enough to feed all the hungry people!

But Jesus is very different to us. Jesus is amazing and can do amazing things. He said ‘thank you’ to God for the small packed lunch and then he began to share it out.

This is yummy! the people said. We’re not hungry anymore!

Jesus isn’t going to give us lots of food – but he can give us life. If you want to know more – come and ask me or take home part of the Bible to read about Jesus for yourself.

Craft Idea – colouring and collage

Take a look at another craft idea for this story (with printable) here

The Man with Four Friends – A Bible Number Story

The Man with Four Friends is our next Bible number story in the series. We are up to the number four! For the other numbers we have told stories about have a look at these links – Number One, Number Two, Number Three

This week the Bible Story is from Mark 2:1-22. The Bible Truth for Toddlers is ‘Jesus can forgive the wrong that people do’.

Man with four friends story bag ideas

To tell the story you need 5 puppets/dolls, a bed/mat and a model or picture of the house and a storybag.

Man with four friends bible story puppets
The four friends
puppet of man on mat
The man on his mat
model of bible time house
Bible time house

The Man with Four Friends – story idea

Can you do some counting with me? Let’s see – use your fingers to count – 1,2,3,4! Today our Bible Story is all about the number 4. Listen to find out when to join in with some counting.

Our story begins in a house with a flat roof and some steps up the side. It had windows and a door. I wonder what could be happening in this house? We are not told who lived in this home, (show the house) but when Jesus arrived lots of people went to the house to meet him. They squashed themselves inside. There was hardly any room. The house was full!

In another part of town there was a man who couldn’t walk. He lay on his bed. (show the man on his bed) He needed the help of his friends everyday. Let’s count the friends together as they come out of the story bag – 1,2,3,4

His friends wanted him to see Jesus.

So, they picked him up and carried him to the house where Jesus was – carefully, carefully they carried their friend through the town to the house where Jesus was…

…they believed Jesus could help their friend.

When they arrived at the house they could not get in the front door because of the crowd. They didn’t give up!

They carried him up the outside stairs and onto the roof – slowly, slowly – carefully, carefully…

…they made a hole in the roof, then – slowly, slowly, carefully, carefully they lowered him down in front of Jesus!

When Jesus saw that they really believed he could help the man he said, “Your sins are forgiven.”

Some people in the house didn’t believe that Jesus could forgive the wrong people do.  So, Jesus said to the man, “So that you can be sure that I can forgive sin, get up, pick up your mat and go home.” Straight away and really quickly he got up and walked home!

All the people in the house were amazed!!

We never saw anything like this! They said to one another.

Craft Idea – free download to colour and/or decorate with tissue paper

This story is also a short video!

Paper Plate Fish Craft

Paper plate fish craft to make. There are so many Bible Stories with fish! You could use this craft for Creation, the Calling of the first disciples, the Great catch of fish, Jesus making breakfast.

paper plate fish craft

Paper plate fish craft – all you need

  • Paper plate (inexpensive and not too sturdy)
  • Cut out a triangle from the plate to make the mouth. (Do this beforehand)
  • Use the triangle for the fish tail. Attach this with glue or staple. (The stapling needs to be done by an adult)
  • Glue
  • Glue lots of shiny paper to the fish. We used a variety including cellophane, tissue paper with a glittery finish, shimmer paper and left over Christmas wrapping paper. (It’s always worthwhile keeping used wrapping paper for crafts)
  • Add an eye. Older children could use googly eyes. I prefer not to use them with toddlers so we draw on eyes instead.
  • Encourage lots of layering of the different types of paper and cellophane to blend the colours.

Here’s a link to another fishy craft. This post also has a story idea.

Jesus and Three Disciples – A Bible Number Story

Jesus and three disciples is our next Bible number story. We are up to the number 3. This Story is from Matthew 17:1-13. (We have already thought about Jonah and One Big Fish and Noah and Two of Every Animal.) This week’s Bible Truth for Toddler’s is, ‘We can listen to Jesus.’ To tell the story you could have three people to take out of a storybag – say hello to them and count them too.

Jesus and three disciples story idea

Meet three of Jesus’ disciples (friends) – Peter, James and John. They knew each other really well.

One day they went for a walk up a mountain – up, up, up they went. No one else was at the top. Just the three of them.

And then something extraordinary happened. Jesus began to shine really brightly.

Peter and James and John looked at Jesus. Something very special was happening. Although Jesus was a man just like them, he was also the Son of God. They were seeing a little bit of his glory. They were seeing just how special Jesus is.

And then they were surrounded by a bright cloud. Not an ordinary cloud – but one that was shining. And they heard God’s voice say, ‘This is my Son, whom I love. Listen to him.’

And then it was over – and they walked back down the mountain.

Jesus really is God’s Son and we can listen to him today by reading God’s Special Book – the Bible.

Three Friends of Jesus – Peter, James and John

Craft Idea

We made shiny pictures – using various types of paper and celophane. Wrapping paper is really good for this. We also had a colouring sheet with the three disciples/friends of Jesus. This is a free download.

Shiny Paper Collage

Playdough Recipe

Playdough recipe to make in the microwave. Don’t be tempted to leave out the cream of tartar, you need it to stop the dough going off.

Ingredients

  • 2 Cups plain flour
  • 2 Cups water
  • 1 Cup salt
  • 2 Tablespoons Cream of Tartar
  • 2 Tablespoons oil (not nut oil or olive oil)
  • Food colouring
Playdough ingredients

Playdough recipe method

  1. Put all the dry ingredients in a large microwavable bowl
  2. Add oil
  3. Add your food colouring to the cold water and mix till dissolved
  4. Add the now coloured water to the mix and stir well
  5. Microwave on high in two minute bursts – stir well after each two minutes.

Your playdough is ready when everything has come together to form a dough. Watch it closely as you cook it in the microwave and reduce the two minutes to one if necessary. Once out of the microwave kneed it for a minute or two – be careful as it will be hot!

Once cool wrap in cling film or put in a plastic container and store in a cool place.

Some ideas of what to do with playdough

Playdough cutters and shapes

Use toddler friendly cookie cutters to make shapes

Playdough in different colours

Make multiple colours at once.

Playdough Easter Garden

Use playdough in an Easter Garden. Take a look at this post all about Easter with toddlers.

Stortelling tip #27

storytelling tip#27 is …

Tell it like you mean it

Tell your Bible Story with conviction. These are the best stories and we have the privilege of sharing them. Tell them in such a way that your listeners know that the Bible is important to you. Tell them in such a way that your listeners will know that Jesus is important.

Jesus said, ‘I am the way, and the truth and the life. No one comes to the Father except through me.’

John 14:6

Here’s a link to the page that has lots of hints and tips about Bible storytelling. These are just some of the things I’ve learnt as I’ve told stories in toddler groups.

Storytelling tip #26

Some details add to your story

Young children are focused on their world. They know about feeling hungry, tired, happy, sad. They know about home. They know what daytime and nightime are. The weather is part of their everyday. Use these familiar things when you tell the Bible Story. If it happened at night mention the stars. If people were hungry get everyone to rub their tummy! Focus on what is familiar to your young audience.

Storytelling tip #25

Be clear

When telling the Bible Story use words that everyone understands. Don’t clutter your story with terminology that you won’t have time to explain. Tell everyone that Zacchaeus was short but leave out his job. You don’t have time to explain to toddlers what tax is.

Storytelling tip #24

Use your voice

You can talk quietly, you can whisper, you can talk LOUDLY. (Don’t shout). Vary your volume. It will make the story sound more interesting. Don’t talk too quickly – we sometimes speed up when we are nervous. Try to use a friendly, calm tone. If you aren’t sure how you sound, record yourself and find out! Your voice is so important.

Stoytelling tip #23

Keep your adult listeners busy

When telling a Bible Story to toddlers it helps to keep their adults involved. Encourage everyone to join in with a variety of actions to do, phrases to repeat, sounds to make.

Storytelling tip #22

Repetition is good.. repetition is good..

A phrase that repeats during the story is great for helping everyone to join in. It could be ‘can you see him?’ for a story about the lost sheep or, ‘where is it?’ for the lost coin. Have a look at this retelling of The Good Samaritan and spot the repeated phrase. Your audience will soon catch on and the adults and their toddlers will be taking part in the story.

Storytelling tip #21

Add some sound

What sound does a …. make? This is a great question to ask during a Bible Story. It gets the toddlers thinking and they can all join in and make the noise. If it’s a story about sheep everyone can say baa. If it’s a pig in the story, it’s an oink. When everyone can join in eveyone feels included and part of the story.